Welcome to the brand-new Primary Bathroom of a fully reimagined upstairs space in a Bettendorf Iowa home. This bath boasts a tiled wet room shower and bathtub area, heated floors, a double sink vanity, a private water closet for the stool, and there is even a tv behind the bathroom window! Village Home Stores provided materials and tilework for this dreamy new bathroom retreat. Let’s have a look around shall we?
What is a Wet Room Bathroom Design?
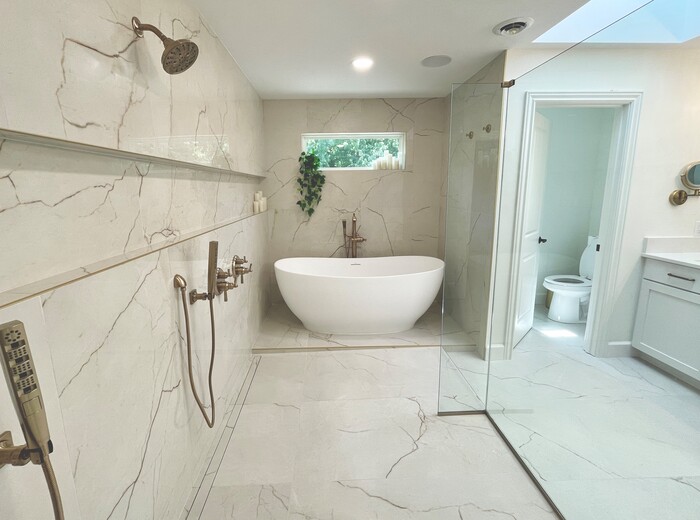
Wet room bathroom designs may be a new phrase floating around online right now, but the concept is nothing new. Chances are you have used a similar setup while staying in a hotel. The idea is to create an entirely tiled room with the shower and many times a tub in an open concept. One floor surface, all at the same level with no shower door or enclosure. In this home we essentially split the space in half with glass and allowed for the look of a wet room with some practical adjustments for it being such a large room.
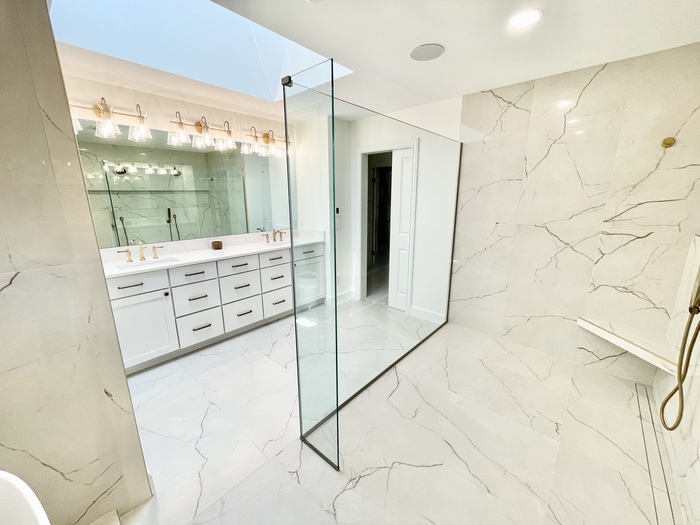
The look is luxurious, but it is admittedly not for everyone. One of the most common complaints in some wet room spaces is that water gets everywhere. Indeed, it can. While one person may praise a wet room layout for the ease of cleaning with fewer edges and surfaces, another may give all that water a thumbs down. Also keep in mind that in larger bathroom spaces, you are open and exposed to the entire room which can be cold at times. This is why many times we include a panel or two of glass to help enclose the designated shower space. You still have the open feel of the entire room but can contain the splash zone and air for the shower when in use. In this bathroom we installed an in-floor heating system to help warm the space up even more.
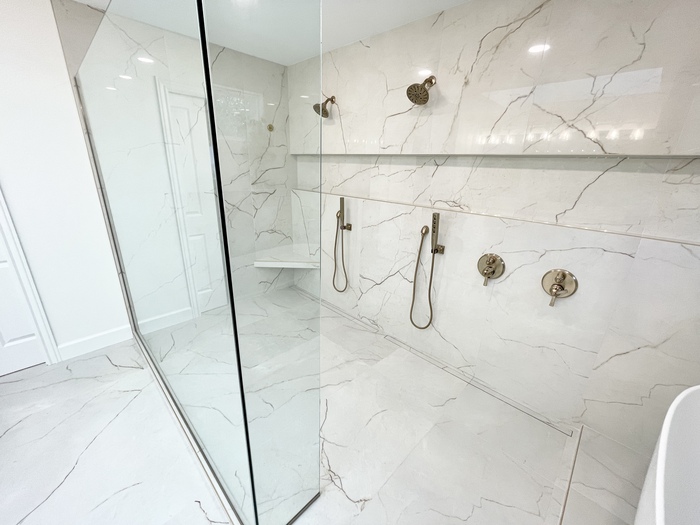
The tiled shower is large and has plenty of space for two shower heads as well as controls and handheld sprays for each one. We included a corner footrest shelf on the far wall and a recessed ledge that travels the entire back length of the bathroom. For anyone who tends to have a lot of toiletries, we recommend this full wall design in place of one small niche. With a wall this long, it is safe to assume that these homeowners should never run out of shelf space. Take a look at another example of this recessed ledge in a smaller shower space over on our Instagram feed.
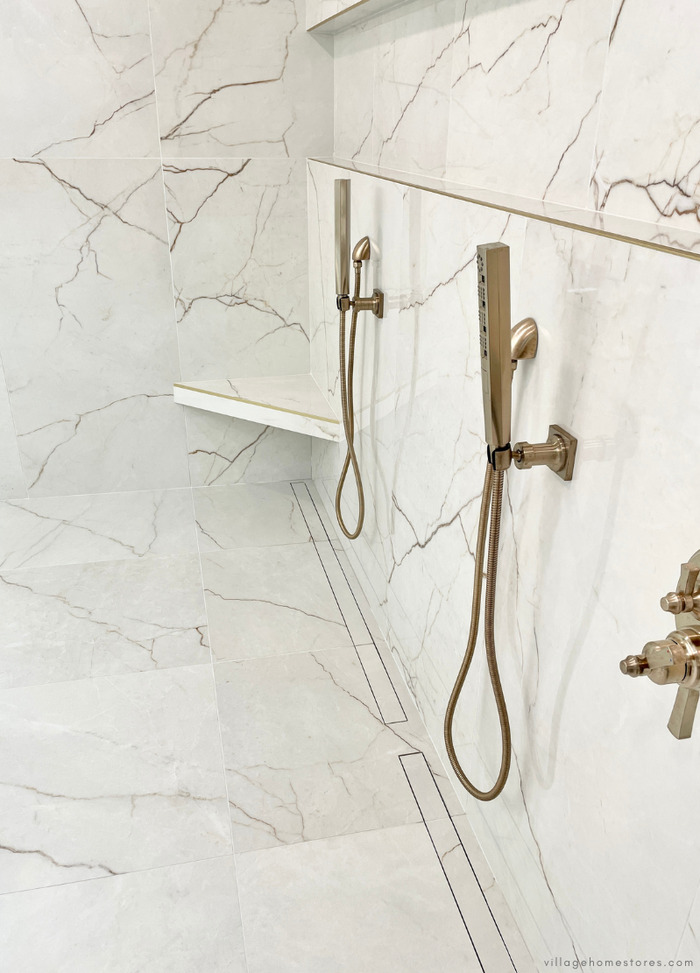
There is a perfect amount of movement from the veining on the tiles to add interest without the room feeling busy. In this bathroom we used large-format (24” x 48”) tiles for the flooring and walls in a combination of glossy and matte finishes. The tiles are from our Phoenix line in the Sunshine series and Segesta Ivory color. Glossy walls add a luxurious sheen and a matte finish for the floors help make for a less slippery surface when wet.
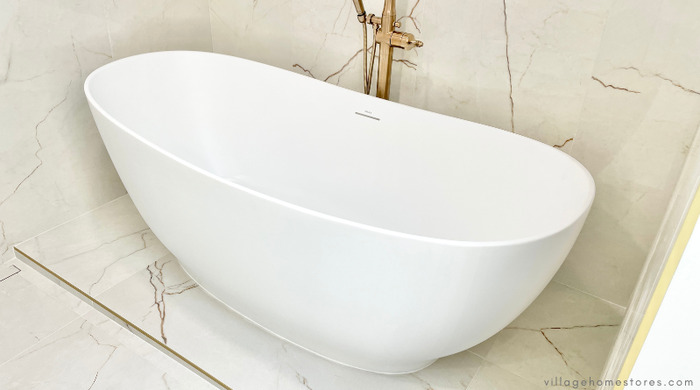
Technically some may not consider this bathroom a true wet room design because we have included a small step up to the shower and tub area. Many designs you may come across when looking at other wet room layouts will have the entire bathroom space all one level of tiled surface for the floor. For a bathroom this size helps to have some designated zones for each area. A small rise to the tub platform keeps the floor surrounding the tub clear from any water the shower may send down that way. But why is that platform look uneven? To send water to the drains of course!
Linear Shower Drains
There is a subtle slope to the shower area to aid drainage and send water to flow back towards the shower drains. And not just any typical drains, linear drains. The look of a linear tiled drain system is incredibly sleek and sometimes so well integrated that you never realize that the drain is even there. Yes, they look great but form always should follow function. This style of drain paired with the sloped shower floor is a perfect combination for functional drainage. The size of this shower space, plus two shower heads called for dual drains as well.
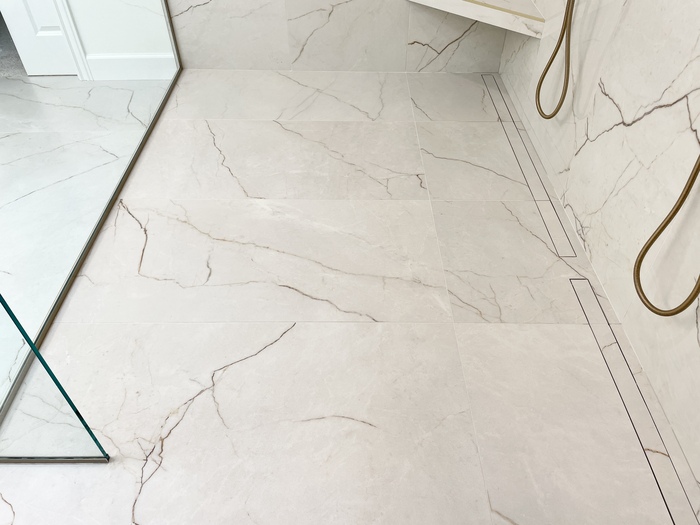
Any tile expert, installer, or contractor would stress that the most important element to any successful tiled shower project is what you can’t see in the finished photos. Products, care, and attention behind that tiled surface is so important. To ensure your shower can perform well over time you need the proper materials for the install. Our tile team will work with you to be sure you have all the needed boards, pans, membranes, trim, etc. for a shower that looks great AND gives you years of safe performance when used.
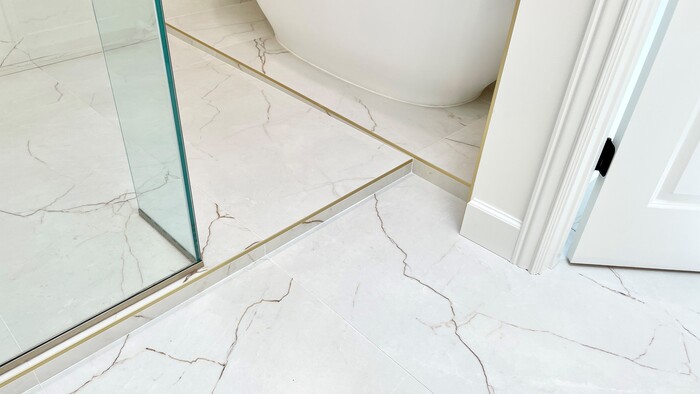
One key design element to all our tiled shower projects is the attention made to exposed edges. We use a system called Schluter that offers an extensive catalog of products for installing tile including edge trim pieces that become a layer of hardware in themselves. We can match these elements to the tile grout or to the metals used in your design. We love the look of selecting a metal finish. These edges look chic and can even help with wayfinding on the floor surface so you can easily spot the steps up or down into the wet room area.
Dual Showerheads and a Double Vanity
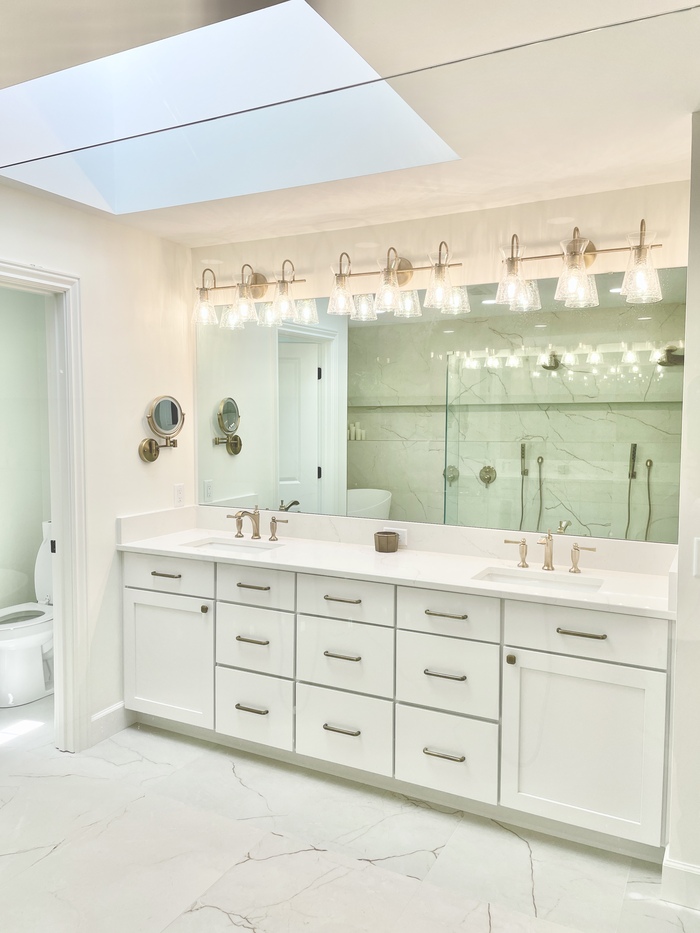
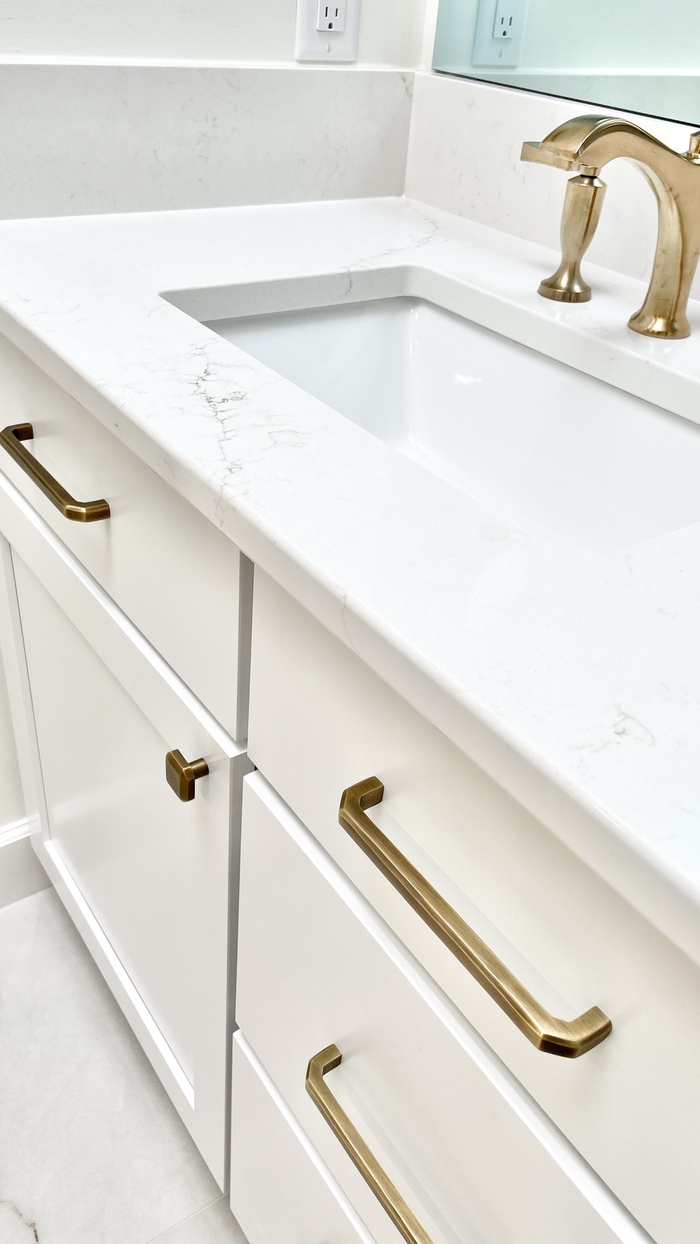
Of course, with a bathroom this size nobody should have to crowd a sink. With so much available space to work with we were able to include two sinks and a lot of storage and countertop space between them. Koch Cabinetry in the Savannah door and painted "White" finish is installed wall to wall with a mirror above. Fun fact: these homeowners opted to use two-way glass for the mirror so they could install a large tv behind it from the adjacent room. There are speakers in the bathroom ceiling (including in the shower) and yes you can see the tv from the tub. How cool is that feature?
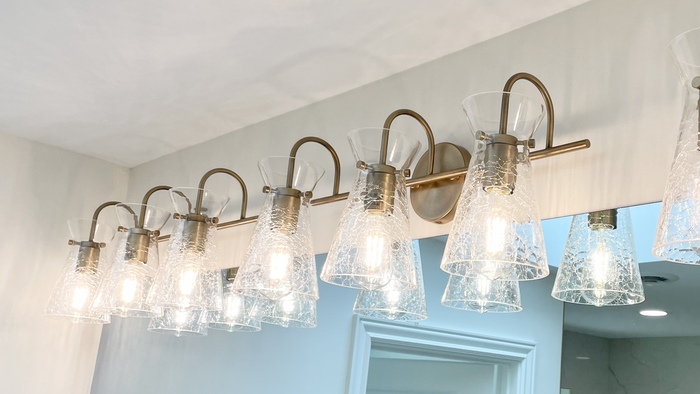
A warm brushed / aged brass finish was used for the plumbing, light fixtures, tile edge trim, and handle hardware in the bathroom. Crackle Glass vanity lights from our Capital lighting line span the full width of the vanity space. The vanity countertops are an engineered MSI Quartz material in the Calacatta Lavasa design with undermounted sinks.
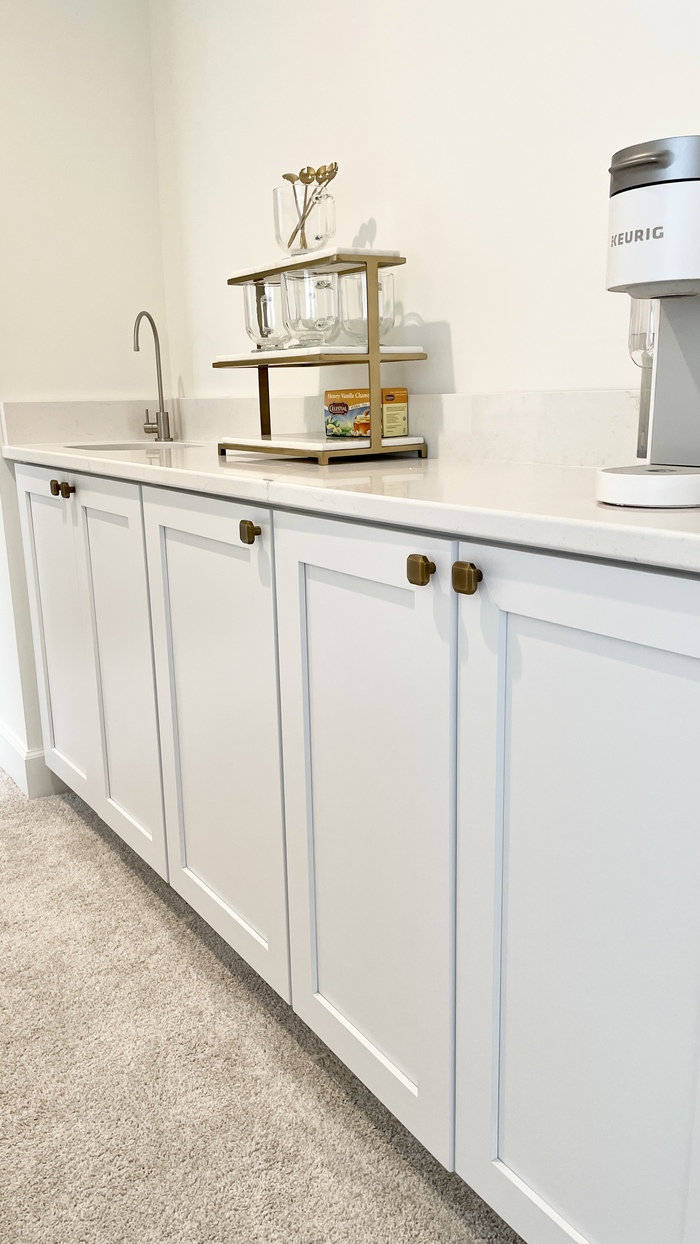
This bathroom was just one area of a full overhaul to the primary suite in this Bettendorf, Iowa home. Many small closets were removed to create one large walk in closet and find space for this new bathroom layout. We also installed new carpeting in the closets, suite hallway, and bedroom area. In that hall from the bath to the bedroom we added a coffee bar area in the same style and finishes as the bathroom vanities. Now there is added storage below and a long counterspace with outlets that can be very versatile.
Want to save some of these ideas for your own bathroom project with us someday? See more of this remodeled bathroom featured on our Houzz portfolio here. If you are looking for inspiration on Pinterest, be sure to find us there and check out this pin board we have organized for you with lots of great bathroom inspiration. Once you are ready to start the conversation about your own bathroom project with Village Home Stores just reach out. You can contact us to make an appointment at (309) 944-1344 or by using the webchat feature on this page. We would love the opportunity to explain our process and show you what our team has to offer for your own dream bathroom retreat in the Quad Cities area.
